Ошибка при подключении внешнего жесткого диска
Как открыть внешний жесткий диск, если он не открывается
Как открыть внешний жесткий диск, если он не открывается
Часто пользователи сталкиваются с проблемой, когда не открывается внешний жесткий диск что делать в такой ситуации?
Чтобы вернуть к жизни нерабочее устройство, необходимо выполнить ряд очень простых действий.

Восстановление нового диска
Если вы не видите новый HDD в папке «Мой компьютер», необходимо просто отформатировать его.
Такая функция позволит корректно настроить разделы жесткого диска и провести разметку данных области хранения. Следуйте инструкции:
1. Откройте меню панели управления;
2. Затем во вкладке администрирования кликните на «управление компьютером»;

Рис. 1 – системное окно «управление компьютером»
3. Слева кликните на меню управления дисками и дождитесь появления в правой части окна данных обо всех подключённых к ПК носителях. Это может занять несколько минут;

Рис. 2 – меню управления накопителями
4. В открывшемся окне вы увидите абсолютно все накопители, которые доступны на компьютере;
5. В контекстном меню HDD нажмите на «Сжать том». Процесс сжатия позволяет выделить дополнительную неразмеченную область;

Рис. 3 – процесс сжатия тома
6. Подождите несколько минут, прежде чем система автоматически определит максимально доступное пространство, которое можно сжать. В новом окне проверьте параметры и кликните на клавишу подтверждения действия.

Рис. 4 – сжатие пространства
Заметьте! Часто HDD не отображается в проводнике из-за неправильного наименования его буквы. В окошке управления дисками можно поменять эту опцию (кликните правой клавишей на имя HDD и выберите «изменить букву или путь»). Помните, что в операционной системе не может быть 2 диска с одинаковым символьным обозначением. Затем нужно перезагрузить компьютер и все будет работать нормально.
Обновление драйверного ПО
Из-за отсутствия необходимых драйверов и настроек, совершенно новый HDD может не отображаться в меню управления дисками. Что же делать в таком случае?
Для исправления неполадки достаточно выполнить установку драйверов с помощью стандартного диспетчера устройств Windows.
Советуем подключить жесткий накопитель к любому другому компьютеру и протестировать его работу. Если все функционирует нормально, существует 100% вероятность того, что на первом компьютере просто нет нужных драйверов.
Выполните следующие шаги:
1. Кликните правой кнопкой манипулятора на кнопке Пуск. В появившемся контекстном меню найдите диспетчер устройств и откройте его;

Рис. 5 – открытие диспетчера
2. В новом окне дождитесь появления всех подключенных к ПК компонентов. Кликните правой клавишей на верхнюю строку – имя вашего компьютера. Обновите все оборудование. Для автоматического скачивания и установки драйверов понадобится соединение с интернетом. Обновление конфигурации может занять некоторое время;

Рис. 6 – обновление оборудования
3. Если во время установки драйверов произошли ошибки, зайдите в разделы «Другие» и «Дисковые девайсы». В случае ошибок элемент иерархии будет отмечен восклицательным знаком. Обновите его драйвера, нажав на соответствующий пункт в контекстном меню.

Рис. 7 – обновление конфигурации дисковых устройств в диспетчере
Таким образом? можно очень легко наладить работу HDD. После обновления выполните перезагрузку операционной системы, чтобы изменения вступили в силу.
HDD не отображается после форматирования
Часто возникает ситуация, когда после удаления данных и форматирования разделов диск перестает подключаться к ПК.
Пользователь подключает девайс, но в меню «Мой компьютер» отсутствует какая-либо информация об HDD. При этом, компьютер определяет диск в разделе «Устройства и принтеры».
Возможно, в процессе форматирования разделов была повреждена файловая система диска. Ее можно восстановить с помощью командной строки.
Откройте эту системную утилиту с помощью сочетания клавиш Win+R и в текстовом поле введите команду cmd. Нажмите на кнопку «ОК».

Рис. 8 – открытие командной строки
В появившемся окне введите команду chkdsk и букву диска. Нажмите Ввод. Система автоматически определит все возникшие на накопителе ошибки и устранит их, изменив файловую систему.
Результат выполнения команды указан на рисунке ниже:

Рис. 9 – выполнение команды chkdsk
Не удается запустить диск
Ели накопитель абсолютно никак не реагирует на подключение к ПК, его можно разобрать и проверить устройство на наличие дефектов печатной платы.
Её элементы могут сгорать из-за резкого перепада напряжения. Как правило, защищают элементы платы от сгорания специальные диоды TVS типа (они отмечены на рисунке ниже).
Один из диодов может быть сломан из-за того же перепада напряжения. Проверьте два TVS компонента с помощью вольтметра.
При обнаруженном нулевом сопротивлении можно говорить о перегорании диода. Замените деталь на новую.

Рис. 10 – печатная плата жесткого диска
Странные звуки во время работы HDD
Если вы услышали странные звуки (потрескивания, щелчки, шипение) во время работы накопителя, как можно быстрее выключите его.
Устройство следует показать специалисту, ведь скорее всего, поврежден магнитный диск или его головка. Включать диск повторно до проведения ремонта не стоит.
Это может привести к его окончательной поломке. Специалист должен заменить сломанную головку и очистить устройство от загрязнений, а также восстановить все данные.

Рис. 11 – поврежденный накопитель
Проблема с питанием внешнего накопителя
Если вы используете мощный внешний накопитель, вполне вероятно, что ему не хватает питания, поэтому ПК и не определяет устройство.
Из-за недостаточного питания диск также может самопроизвольно отключаться, зависать.
Внешнее устройство работает за счет соединения с компьютером через USB-разъем. Так как сила электрического тока в подобных портах ограниченна, диску может не хватать заряда.
- Используйте короткий шнур USB. Самая распространенная причина плохой работы заключается в использовании слишком длинных проводов. Большая часть полученного от порта заряда просто не доходит до накопителя, так как теряется по пути. Советуем использовать только короткие провода, которые поставляются официальным производителем вашего HDD;
- У внешнего накопителя есть два разъёма подключения? В таком случае целесообразнее будет использовать их одновременно, так как для передачи данных хватает одного порта, а вот для получения необходимого заряда необходим второй порт;
- Возможно, блок питания вашего компьютера просто несовместим с приобретённым внешним накопителем. В таком случае, единственный выход – замена устаревшего блока питания.
Что делать, если компьютер не видит внешний жесткий диск
Детальная информация для быстрого восстановления работы HDD-накопителя.
Аппаратная поломка
Ошибка в определении компьютером жёсткого HDD может быть причиной физической поломки девайса. Они могут возникать вследствие падений и ударов. Поломки бывают следующими:
- Выход из строя основного контроллера;
- Заклинивание подшипников, считывающих головок;
- Неисправности отдельных компонентов микросхемы.
Помните, любая аппаратная неисправность требует профессионального вмешательства. При своевременном обращении к специалистам вы сможете восстановить все утерянные данные.
USB External Troubleshooter
There are several reasons why an external hard drive may not be accessible or detected when you connect it to your computer.
While it is possible that your external hard drive may have come with bundled software that may be incompatible with newer operating systems, this is typically just ‘back up’ software, and the drive is not dependent on that software to function.
The external hard drive itself, under normal circumstances, should be detected by your operating system, without the need of drivers, software or firmware updates.
If your external hard drive is not accessible please try these basic troubleshooting steps first.
Basic hardware troubleshooting steps:
- Try connecting the drive to a different port on the computer.
- If possible, try using a different cable.
- Try using the drive on a different computer.
- Verify the drive light is on. Desktop Drives typically require a power adapter. No light could indicate the power adapter is not connected to power.
- Try a different power outlet. (Desktop Drives)
- If using a surge protector or power strip, plug the power adapter directly into the wall outlet instead.(Desktop Drives)
For advanced troubleshooting steps select your operating system:
Windows
Check both Device Manager and Disk Management in the Computer Management console:
Steps:
- On your keyboard, hold the Windows Key (

 ) down and press R.
 - Type compmgmt.msc into to the run box.
- Click on Device Manager on the left.
- First check the Disk Drives section in the middle window by double-clicking it.
- Look for your drive name. If you see the drive is detected here continue reading. If not, click here.
- Right click on your external drive listed under Disk Drives.
- Click on Properties.
- Click on the “Volumes” tab.
- Click on Populate.
- Document the disk number provided in this window (Disk 1, Disk 2, etc…).
- Now click on Disk Management on the left-hand side. This will allow us to view the drive’s health.
- In the middle towards the bottom locate the disk number from earlier.
Once you have located the drive you will want to look for the following:
Does it show RAW or Unallocated? Either of these indicates a possible issue with the drive’s formatting.

If the drive shows as RAW or Unallocated and you have already tried a different port, cable, and computer but you need the data, then you will want to consider data recovery.
If you do not need any data from the drive, you should be able to reformat the drive to restore accessibility. Read our How To Format Your Drive article for instructions on the process. WARNING: Formatting erases all data on the drive.
If the drive is formatted correctly for Windows you should see the following information:
- NTFS — If NTFS is missing then the file system has become corrupted. You can format the drive if you don’t need the data.
- Capacity — Check to see if the drive is correct, for example if you have a 1 TB drive it should say 931 GB.
- Drive letter — Verify that the drive has a drive letter. If it is missing, verify that other drives have a letter. If other drives have a letter but the external is missing then you can right-click and select change drive letter or path.
- Click Add then assign a letter and OK.

Drive not detected troubleshooting:
If the drive was not detected under Disk Drives then check the following:
- Within Device Manager look for any entries called unknown device, other device, or mass storage device with a yellow ! icon. Important — Make sure to expand the Universal Serial Bus controllers section so you can see entries there as well.
- If you see an unknown device or other device then right-click on it and select properties.
- Under the general tab locate ‘Device Status’ and there may be an error code.
- You may see a code 10 or 28.
If you see Code 10 and have already tried another cable and computer then the drive has probably failed.
If you need the data on the drive, then you will want to consider data recovery.
If you do not need the data and the drive is still within warranty, you will want to have the drive replaced. Visit the Warranty and Replacements section on Seagate.com for further details.
If you see Code 28 (this may work for others codes too, i.e. Code 43) then try the following:
- Close the window with the code.
- Right-click on the device with the issue and select uninstall.
- Shut the computer down and disconnect the drive.
- Reboot with the drive disconnected.
- Once the computer is booted, plug the drive into a different port.
- You should see that Windows is installing device drivers.
- Once the driver loads, check to see if it is giving the same Code.
Note: If that fails, you will need to try to reload the USB drivers for the operating system by inserting your Windows Media, rebooting and attempting a Repair/Restore.
Warning: This can be dangerous to your data and you should disconnect your external drive before attempting this.
Macintosh
If the drive is not showing on your desktop or within Finder check Disk Utility.
Open Finder > Applications > Utilities > Disk Utility
If the drive is not detected in Disk Utility then see the System Information/System Profiler section.
If you are using macOS 10.13 or higher then click view in the upper left and select “Show All Devices” which allows you to see both the disk as well as volumes.
The non-indented entry is the physical disk entry and when selected should say media in the name. In Mac OS X version 10.6 to 10.10 this entry will display the capacity of the drive instead of saying media. The indented entries will vary depending on how the drive is formatted but these entries will be volumes or containers associated to the physical disk.
Select the indented entry for your drive and click on the “Mount” button at the top of the Disk Utility. If the drive didn’t mount this indicates some level of file system corruption.
Select the indented entry and then click on First Aid
- In Mac OS X version 10.6 to 10.10, click Verify Disk to see if the volume needs to be repaired.
- Once the Verify Disk process is complete it will suggest you repair the disk or tell you there is nothing wrong with it.
- If this is not the only copy of your important data, then try to run the Repair Disk process to see if it resolves the file system corruption.
- If this is the only copy of your important data, then we suggest running data recovery software on the drive in an attempt to retrieve your files.
- If the Repair Disk process fails to repair the disk then you will want to reformat it to see if you are dealing with a physical issue or a logical issue. WARNING: Formatting erases all data on the drive.
- If there is no indented entry then the drive needs to be formatted or run the data recovery software on the drive in an attempt to retrieve your files.
If the drive needs to be formatted then click on the article that matches the operating system.
How to format a drive in Mac OS 10.6 to 10.10
How to format your drive in macOS 10.11 and above
If the drive is not detected in Disk Utility then check System Information/System Profiler.
Hold the Option key then click on the Apple Icon, the first entry should say System Information/System Profiler. If it says About this Mac then press and hold the option key again.
Once in System Information/System Profiler:
- On the left-hand side locate Hardware
- Under hardware locate the interface you are using (i.e. USB, Firewire, Thunderbolt, etc.)
- In the middle window, locate the drive and select it
- You should see the drive information listed in centre at the bottom
- The serial and/or model number should be listed
If the drive is not in System Information/System Profiler or in Disk Utility then try another Mac to see if the drive is detected there. If the drive is detected on the other Mac then continue with the following Apple specific troubleshooting.
Trying some of Apple specific troubleshooting may help resolve the issue.
Reboot into Safe Mode and see if the drive is detected. If it is detected then reboot back into normal mode and see if the drive is now detected
If that does not resolve the issue then try each of the following resets. Sometimes it helps to do these more than once.
If you have exhausted either of the Windows or Macintosh advanced troubleshooting steps, and your external hard drive is still not accessible or detected, for further assistance contact Seagate support.
USB External Troubleshooter
There are several reasons why an external hard drive may not be accessible or detected when you connect it to your computer.
While it is possible that your external hard drive may have come with bundled software that may be incompatible with newer operating systems, this is typically just ‘back up’ software, and the drive is not dependent on that software to function.
The external hard drive itself, under normal circumstances, should be detected by your operating system, without the need of drivers, software or firmware updates.
If your external hard drive is not accessible please try these basic troubleshooting steps first.
Basic hardware troubleshooting steps:
- Try connecting the drive to a different port on the computer.
- If possible, try using a different cable.
- Try using the drive on a different computer.
- Verify the drive light is on. Desktop Drives typically require a power adapter. No light could indicate the power adapter is not connected to power.
- Try a different power outlet. (Desktop Drives)
- If using a surge protector or power strip, plug the power adapter directly into the wall outlet instead.(Desktop Drives)
For advanced troubleshooting steps select your operating system:
Windows
Check both Device Manager and Disk Management in the Computer Management console:
Steps:
- On your keyboard, hold the Windows Key () down and press R.
- Type compmgmt.msc into to the run box.
- Click on Device Manager on the left.
- First check the Disk Drives section in the middle window by double-clicking it.
- Look for your drive name. If you see the drive is detected here continue reading. If not, click here.
- Right click on your external drive listed under Disk Drives.
- Click on Properties.
- Click on the “Volumes” tab.
- Click on Populate.
- Document the disk number provided in this window (Disk 1, Disk 2, etc…).
- Now click on Disk Management on the left-hand side. This will allow us to view the drive’s health.
- In the middle towards the bottom locate the disk number from earlier.
Once you have located the drive you will want to look for the following:
Does it show RAW or Unallocated? Either of these indicates a possible issue with the drive’s formatting.
If the drive shows as RAW or Unallocated and you have already tried a different port, cable, and computer but you need the data, then you will want to consider data recovery.
If you do not need any data from the drive, you should be able to reformat the drive to restore accessibility. Read our How To Format Your Drive article for instructions on the process. WARNING: Formatting erases all data on the drive.
If the drive is formatted correctly for Windows you should see the following information:
- NTFS — If NTFS is missing then the file system has become corrupted. You can format the drive if you don’t need the data.
- Capacity — Check to see if the drive is correct, for example if you have a 1 TB drive it should say 931 GB.
- Drive letter — Verify that the drive has a drive letter. If it is missing, verify that other drives have a letter. If other drives have a letter but the external is missing then you can right-click and select change drive letter or path.
- Click Add then assign a letter and OK.
Drive not detected troubleshooting:
If the drive was not detected under Disk Drives then check the following:
- Within Device Manager look for any entries called unknown device, other device, or mass storage device with a yellow ! icon. Important — Make sure to expand the Universal Serial Bus controllers section so you can see entries there as well.
- If you see an unknown device or other device then right-click on it and select properties.
- Under the general tab locate ‘Device Status’ and there may be an error code.
- You may see a code 10 or 28.
If you see Code 10 and have already tried another cable and computer then the drive has probably failed.
If you need the data on the drive, then you will want to consider data recovery.
If you do not need the data and the drive is still within warranty, you will want to have the drive replaced. Visit the Warranty and Replacements section on Seagate.com for further details.
If you see Code 28 (this may work for others codes too, i.e. Code 43) then try the following:
- Close the window with the code.
- Right-click on the device with the issue and select uninstall.
- Shut the computer down and disconnect the drive.
- Reboot with the drive disconnected.
- Once the computer is booted, plug the drive into a different port.
- You should see that Windows is installing device drivers.
- Once the driver loads, check to see if it is giving the same Code.
Note: If that fails, you will need to try to reload the USB drivers for the operating system by inserting your Windows Media, rebooting and attempting a Repair/Restore.
Warning: This can be dangerous to your data and you should disconnect your external drive before attempting this.
Macintosh
If the drive is not showing on your desktop or within Finder check Disk Utility.
Open Finder > Applications > Utilities > Disk Utility
If the drive is not detected in Disk Utility then see the System Information/System Profiler section.
If you are using macOS 10.13 or higher then click view in the upper left and select “Show All Devices” which allows you to see both the disk as well as volumes.
The non-indented entry is the physical disk entry and when selected should say media in the name. In Mac OS X version 10.6 to 10.10 this entry will display the capacity of the drive instead of saying media. The indented entries will vary depending on how the drive is formatted but these entries will be volumes or containers associated to the physical disk.
Select the indented entry for your drive and click on the “Mount” button at the top of the Disk Utility. If the drive didn’t mount this indicates some level of file system corruption.
Select the indented entry and then click on First Aid
- In Mac OS X version 10.6 to 10.10, click Verify Disk to see if the volume needs to be repaired.
- Once the Verify Disk process is complete it will suggest you repair the disk or tell you there is nothing wrong with it.
- If this is not the only copy of your important data, then try to run the Repair Disk process to see if it resolves the file system corruption.
- If this is the only copy of your important data, then we suggest running data recovery software on the drive in an attempt to retrieve your files.
- If the Repair Disk process fails to repair the disk then you will want to reformat it to see if you are dealing with a physical issue or a logical issue. WARNING: Formatting erases all data on the drive.
- If there is no indented entry then the drive needs to be formatted or run the data recovery software on the drive in an attempt to retrieve your files.
If the drive needs to be formatted then click on the article that matches the operating system.
How to format a drive in Mac OS 10.6 to 10.10
How to format your drive in macOS 10.11 and above
If the drive is not detected in Disk Utility then check System Information/System Profiler.
Hold the Option key then click on the Apple Icon, the first entry should say System Information/System Profiler. If it says About this Mac then press and hold the option key again.
Once in System Information/System Profiler:
- On the left-hand side locate Hardware
- Under hardware locate the interface you are using (i.e. USB, Firewire, Thunderbolt, etc.)
- In the middle window, locate the drive and select it
- You should see the drive information listed in centre at the bottom
- The serial and/or model number should be listed
If the drive is not in System Information/System Profiler or in Disk Utility then try another Mac to see if the drive is detected there. If the drive is detected on the other Mac then continue with the following Apple specific troubleshooting.
Trying some of Apple specific troubleshooting may help resolve the issue.
Reboot into Safe Mode and see if the drive is detected. If it is detected then reboot back into normal mode and see if the drive is now detected
If that does not resolve the issue then try each of the following resets. Sometimes it helps to do these more than once.
If you have exhausted either of the Windows or Macintosh advanced troubleshooting steps, and your external hard drive is still not accessible or detected, for further assistance contact Seagate support.
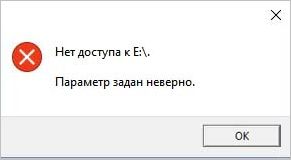
Как исправить ошибку «Параметр задан неверно» при доступе к диску?
При обращении к диску возникают ситуации, при которых система может отказать в доступе, возвращая при этом сообщение об ошибке «параметр задан неверно». Узнаем подробнее способы устранения этой проблемы.
Проверка CHKDSK
С помощью встроенного приложения CHKDSK можно проверить жесткий диск на наличие несоответствий или поврежденных секторов. Возможно, область записи драйверов устройств повреждена или находится в конфликте с другим объектом.
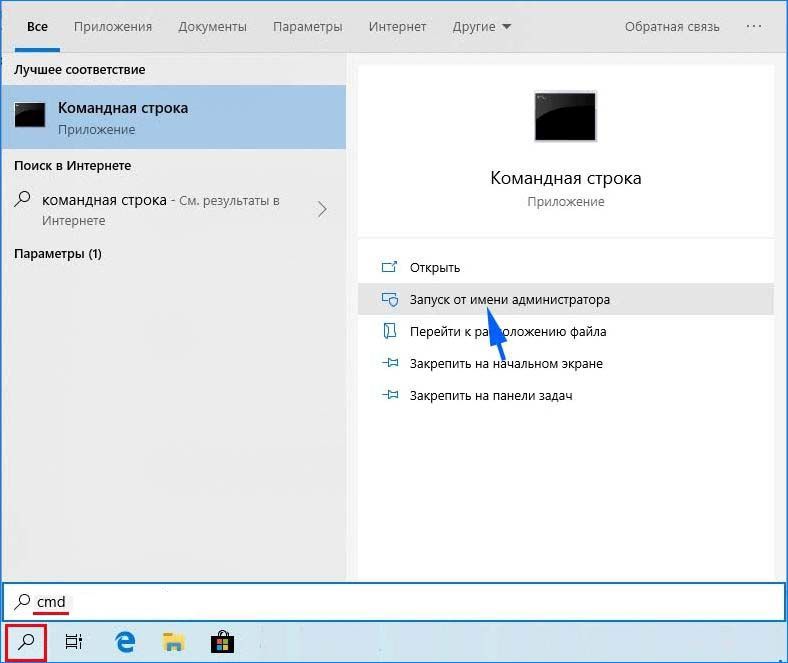
В поле системного поиска наберите «командная строка», при отображении результата щелкните на «Запуск от имени администратора».

В консоли выполните команду:
CHKDSK D: / F /R

В примере указан диск «D». Если проблемы с другим накопителем, укажите соответствующую букву.
Если при запуске обнаружили, что системе не удается выполнить CHKDSK, поскольку указанный том используется другим процессом, нажмите на «Y». Сканирование начнется сразу при следующем запуске системы.
Проверка может выполняться продолжительное время. После завершения запустите команду для обнаружения и восстановления поврежденных системных файлов:

Дождитесь завершения сканирования. Если по итогам не все файлы были исправлены, выполните команду:
DISM /Online /Cleanup-Image /RestoreHealth
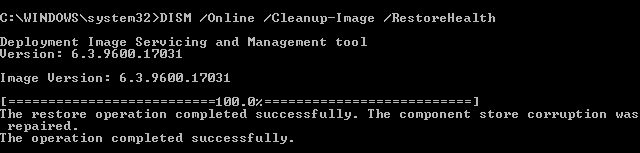
После завершения выйдите из командной строки и перезагрузите компьютер.
Проверка доступа в безопасном режиме
В первую очередь проверьте, отображается ли накопитель в разделе Управления дисками.
Для этого нажмите Win + R, наберите diskmgmt.msc и щелкните на «ОК».
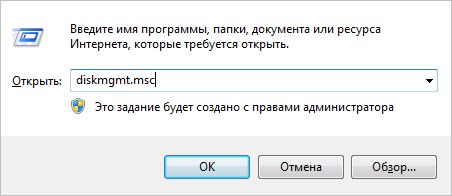
Проверьте, есть ли в списке проблемный диск. Если присутствует, перезагрузите компьютер в безопасном режиме.
В этом режиме можно определить, связана ли проблема с каким-либо фоновым процессом или службой. Если при доступе к диску не сталкиваетесь с ошибкой «параметр задан неверно», это значит, что какое-то стороннее приложение или служба вызывает ошибку или у вас нет разрешений для доступа к накопителю.
По этому, если есть доступ к файлам в безопасном режиме, скорее всего, у вашей текущей учетной записи нет разрешений на использование диска. Выполните следующие шаги, чтобы изменить владельца.
В поле поиска Windows введите «cmd», при отображении результата запустите с правами администратора.
В консоли выполните команду:
cacls D: /g Все:F /c /t
В примере указан «D», измените букву на соответствующую проблемному накопителю. Эта команда предоставляет полный доступ к диску для всех групп пользователей.
После перезагрузите ПК и проверьте, решена ли проблема.
Изменение формата с NTFS на FAT32 (для внешнего устройства)
В качестве последнего средства попробуйте преобразовать формат из NTFS в FAT32. Обратите внимание, что данные, присутствующие на диске будут полностью удалены. Поэтому создайте резервную копию, прежде чем приступить к решению.
Для выполнения также требуются права администратора.
В поле системного поиска наберите «cmd» , при отображении искомого результата нажмите Запуск от имени администратора».
В консоли запустите команду:
format D: /FS:exFAT /V:МеткаТома /Q /A:4096 /X
Также обратите внимание, что в примере указан «D», поэтому измените букву на соответствующую проблемному дисковому устройству. После завершения процесса перезагрузите ПК.