Php artisan serve
Laravel Quickstart
Installation
Via Laravel Installer
First, download the Laravel installer using Composer.
Make sure to place the
/.composer/vendor/bin directory in your PATH (or C:%HOMEPATH%AppDataRoamingComposervendorbin if working with Windows) so the laravel executable is found when you run the laravel command in your terminal.
Once installed, the simple laravel new command will create a fresh Laravel installation in the directory you specify. For instance, laravel new blog would create a directory named blog containing a fresh Laravel installation with all dependencies installed. This method of installation is much faster than installing via Composer.
Via Composer
The Laravel framework utilizes Composer for installation and dependency management. If you haven’t already, start by installing Composer.
Now you can install Laravel by issuing the following command from your terminal:
This command will download and install a fresh copy of Laravel in a new your-project-name folder within your current directory.
If you prefer, you can alternatively download a copy of the Laravel repository from GitHub manually. Next run the composer install command in the root of your manually created project directory. This command will download and install the framework’s dependencies.
Permissions
After installing Laravel, you may need to grant the web server write permissions to the app/storage directories. See the Installation documentation for more details on configuration.
Serving Laravel
Typically, you may use a web server such as Apache or Nginx to serve your Laravel applications. If you are on PHP 5.4+ and would like to use PHP’s built-in development server, you may use the serve Artisan command:
By default the HTTP-server will listen to port 8000. However if that port is already in use or you wish to serve multiple applications this way, you might want to specify what port to use. Just add the —port argument:
Directory Structure
After installing the framework, take a glance around the project to familiarize yourself with the directory structure. The app directory contains folders such as views , controllers , and models . Most of your application’s code will reside somewhere in this directory. You may also wish to explore the app/config directory and the configuration options that are available to you.
Local Development Environment
In the past, configuring a local PHP development environment on your machine was a headache. Installing the proper version of PHP, required extensions, and other needed components is time consuming and confusing. Instead, consider using Laravel Homestead. Homestead is a simple virtual machine designed for Laravel and Vagrant. Since the Homestead Vagrant box is pre-packaged with all of the software you need to build robust PHP applications, you can create a virtualized, isolated development environment in seconds. Here is a list of some of the goodies included with Homestead:
Don’t worry, even though «virtualized» sounds complicated, it’s painless. VirtualBox and Vagrant, which are Homestead’s two dependencies, both include simple, graphical installers for all popular operating systems. Check out the Homestead documentation to get started.
Routing
To get started, let’s create our first route. In Laravel, the simplest route is a route to a Closure. Pop open the app/routes.php file and add the following route to the bottom of the file:
Now, if you hit the /users route in your web browser, you should see Users! displayed as the response. Great! You’ve just created your first route.
Routes can also be attached to controller classes. For example:
This route informs the framework that requests to the /users route should call the getIndex method on the UserController class. For more information on controller routing, check out the controller documentation.
Creating A View
Next, we’ll create a simple view to display our user data. Views live in the app/views directory and contain the HTML of your application. We’re going to place two new views in this directory: layout.blade.php and users.blade.php . First, let’s create our layout.blade.php file:
Next, we’ll create our users.blade.php view:
Some of this syntax probably looks quite strange to you. That’s because we’re using Laravel’s templating system: Blade. Blade is very fast, because it is simply a handful of regular expressions that are run against your templates to compile them to pure PHP. Blade provides powerful functionality like template inheritance, as well as some syntax sugar on typical PHP control structures such as if and for . Check out the Blade documentation for more details.
Now that we have our views, let’s return it from our /users route. Instead of returning Users! from the route, return the view instead:
Wonderful! Now you have setup a simple view that extends a layout. Next, let’s start working on our database layer.
Creating A Migration
To create a table to hold our data, we’ll use the Laravel migration system. Migrations let you expressively define modifications to your database, and easily share them with the rest of your team.
First, let’s configure a database connection. You may configure all of your database connections from the app/config/database.php file. By default, Laravel is configured to use MySQL, and you will need to supply connection credentials within the database configuration file. If you wish, you may change the driver option to sqlite and it will use the SQLite database included in the app/database directory.
Next, to create the migration, we’ll use the Artisan CLI. From the root of your project, run the following from your terminal:
Next, find the generated migration file in the app/database/migrations folder. This file contains a class with two methods: up and down . In the up method, you should make the desired changes to your database tables, and in the down method you simply reverse them.
Let’s define a migration that looks like this:
Next, we can run our migrations from our terminal using the migrate command. Simply execute this command from the root of your project:
If you wish to rollback a migration, you may issue the migrate:rollback command. Now that we have a database table, let’s start pulling some data!
Eloquent ORM
Laravel ships with a superb ORM: Eloquent. If you have used the Ruby on Rails framework, you will find Eloquent familiar, as it follows the ActiveRecord ORM style of database interaction.
First, let’s define a model. An Eloquent model can be used to query an associated database table, as well as represent a given row within that table. Don’t worry, it will all make sense soon! Models are typically stored in the app/models directory. Let’s define a User.php model in that directory like so:
Note that we do not have to tell Eloquent which table to use. Eloquent has a variety of conventions, one of which is to use the plural form of the model name as the model’s database table. Convenient!
Using your preferred database administration tool, insert a few rows into your users table, and we’ll use Eloquent to retrieve them and pass them to our view.
Now let’s modify our /users route to look like this:
Let’s walk through this route. First, the all method on the User model will retrieve all of the rows in the users table. Next, we’re passing these records to the view via the with method. The with method accepts a key and a value, and is used to make a piece of data available to a view.
Awesome. Now we’re ready to display the users in our view!
Displaying Data
Now that we have made the users available to our view, we can display them like so:
You may be wondering where to find our echo statements. When using Blade, you may echo data by surrounding it with double curly braces. It’s a cinch. Now, you should be able to hit the /users route and see the names of your users displayed in the response.
This is just the beginning. In this tutorial, you’ve seen the very basics of Laravel, but there are so many more exciting things to learn. Keep reading through the documentation and dig deeper into the powerful features available to you in Eloquent and Blade. Or, maybe you’re more interested in Queues and Unit Testing. Then again, maybe you want to flex your architecture muscles with the IoC Container. The choice is yours!
Deploying Your Application
One of Laravel’s goals is to make PHP application development enjoyable from download to deploy, and Laravel Forge provides a simple way to deploy your Laravel applications onto blazing fast servers. Forge can configure and provision servers on DigitalOcean, Linode, Rackspace, and Amazon EC2. Like Homestead, all of the latest goodies are included: Nginx, PHP 5.6, MySQL, Postgres, Redis, Memcached, and more. Forge «Quick Deploy» can even deploy your code for you each time you push changes out to GitHub or Bitbucket!
On top of that, Forge can help you configure queue workers, SSL, Cron jobs, sub-domains, and more. For more information, visit the Forge website.
Become a Laravel Partner
Laravel Partners are elite shops providing top-notch Laravel development and consulting. Each of our partners can help you craft a beautiful, well-architected project.
Как отладить php artisan serve в PHPStorm?
Я использую PHPStorm для разработки моих веб-страниц PHP. Все отлично работает с моим сервером Apache, XDebug и простым веб-проектом PHP. Нет проблем.
Но когда я пытаюсь отладить веб-проект Laravel 5.1, используя php artisan serve Я не могу отладить точки останова. Это как php artisan serve использовать другой сервер …
И на моем PHPStorm я всегда вижу:
Ожидание входящего соединения с ключом ide ‘(randomNumberHere)’
Я настроил все в PHPStorm (включение удаленной отладки, правильный порт и т. Д.), И с «нормальными» проектами PHP все работает нормально.
Может кто-нибудь сказать мне, если мне нужно что-то изменить?
Решение
Отладка с использованием php artisan serve не работает, если вы не включили отладку в INI-файле.
@ Богдан указал на причину. artisan serve вызовет встроенный веб-сервер PHP, но не передает параметры командной строки php (параметры именованного интерпретатора в PHPStorm).
т.е. если вы выполняете из командной строки:
Тогда эти параметры даны -d не передаются на называемый встроенный веб-сервер PHP. Вы можете увидеть вызов встроенного сервера Вот .
Обходной путь в PHPStorm заключается в создании конфигурации Run, которая напрямую вызывает встроенный веб-сервер PHP. Инструкции:
- Откройте Run -> Редактировать конфигурации …
- Создайте новый встроенный веб-сервер PHP
- Ведущий: localhost
- Порт: 8000
- Корень документа: выберите публичный каталог Laravel
- Проверьте Use route script и выберите server.php в корневом каталоге проектов Laravel.
- Варианты переводчика: -dxdebug.remote_enable=1 -dxdebug.remote_mode=req -dxdebug.remote_port=9000 -dxdebug.remote_host=127.0.0.1
Теперь PHPStorm выполнит ту же команду, что и php artisan serve делает с дополнительными опциями переводчика. На самом деле php artisan serve Единственная цель — добавить файл server.php на встроенный веб-сервер PHP. server.php просто эмулирует Apache mod_rewrite функциональность.
Обновление: Хорошее напоминание от @ attila-szeremi: убедитесь, что включен «Начать прослушивание отладочных подключений PHP», что вам нужно сделать вручную, если вы не запускаете конфигурацию PhpStorm с «Отладкой»
Другие решения
Я не использую phpstorm, но, возможно, решение, которое я использую для отладки в netbeans, окажется полезным.
artisan serve использует INI-файл, отличный от того, который загружен вашим веб-контейнером.
Найдите это, набрав
На моем Ubuntu Box это находится в
Отредактируйте ini для вашей среды cli и используйте ту же конфигурацию, которую вы использовали, чтобы включить ее для вашего веб-контейнера;
Единственное предостережение для этого, это то, что, пока вы настроили это, это повлияет на другие вещи, для которых вы используете php cli.
Если вы хотите, чтобы сеанс отладки всегда запускался автоматически (вместо инициирования удаленной отладки с помощью параметра запроса URL-адреса XDEBUG_SESSION_START = name, например, при отладке содержимого интерфейса командной строки), вы можете настроить XDEBUG, чтобы всегда запускать сеанс удаленной отладки с этой дополнительной конфигурацией;
Обычно вам нужно использовать определенную переменную HTTP GET / POST для запуска удаленной отладки (см. Удаленная отладка). Если для этого параметра установлено значение 1, Xdebug всегда будет пытаться запустить сеанс удаленной отладки и попытаться подключиться к клиенту, даже если переменная GET / POST / COOKIE отсутствовала.
Итак, после прохождения Джеффри Будь потрясающим в PhpStorm, Я застрял в ситуации, аналогичной OP (в главе, касающейся Xdebug и Laravel). Я устанавливал точки останова, но PhpStorm не смог прервать выполнение в соответствии с этими точками. И, честно говоря, ответ Джоша здесь несколько помог мне понять проблему, но не был достаточно ясен для меня. Итак, я вышел и сам нашел решение методом проб и ошибок, окончательное решение, которым я хочу поделиться. Может быть, это пригодится некоторым людям, которые все еще задаются вопросом.
Во-первых, как сказал / предположил ОП, php artisan server делает использовать другой сервер. Это встроенный в PHP веб-сервер плюс server.php файл роутера. И конфигурации, которые он использует, являются конфигурациями CLI. Пытаться php —ini найти все включенные конфигурации.
В моем случае (Ubuntu 17.10) включаемый файл конфигурации Xdebug находился в той же папке /etc/php/7.2/cli/conf.d/20-xdebug.ini , Я добавил вторую строку, чтобы включить удаленный xdebug, и теперь файл выглядит примерно так: всего 2 строки:
Теперь для настройки PhpStorm:
- Run > Edit Configurations и дать любое имя или просто оставить его как неназванный
- Нажмите . после Сервер: вариант
- Нажмите + и дать любое имя (например, Laravel App)
- Задавать хозяин как localhost , порт как 8000 а также дебаггер как Xdebug и оставьте любые другие галочки не отмеченными!
- Нажмите Apply / OK
- Из выпадающего списка Сервер: выберите тот, который мы только что создали.
- Установить Начальный URL: URL, с которого вы хотите начать отладку (например, user )
- Выберите браузер, который вы предпочитаете.
- Нажмите Apply / OK
Помните, что отладчик будет работать только после запуска самого веб-сервера, то есть сервера, который запускается с php artisan server команда.
Теперь запустите веб-сервер т.е. php artisan serve и в PhpStorm нажмите Run > Debug ‘your-debug-config’ и все должно работать нормально!
Установка Laravel в Ubuntu
Фреймворк Laravel пользуется популярностью за счет ряда факторов:
- он объектно-ориентированный;
- соблюдается модель MVC;
- доступна поддержка нескольких баз данных.
Кроме того, в нем доступна масса инструментов для развертывания приложений и упрощения веб-разработки. Рассмотрим, как выглядит установка Laravel на Ubuntu.
Подготовка к установке
Чтобы запустить на веб-сервере Laravel, в Ubuntu необходимо удовлетворить ряд зависимостей. Все необходимые для работы компоненты имеются в наличии на виртуальной машине Laravel Homestead. Поэтому разработчики рекомендуют использовать именно ее для запуска на локальной машине.
Тем не менее, развертывать и тестировать приложения в основном придется на веб-серверах с Linux, а не на Homestead. Чтобы установить Laravel на таком веб-сервере, на нем должны быть установлена версия PHP >= 7.2.0 и следующие расширения PHP:
- BCMath PHP Extension;
- Ctype PHP Extension;
- JSON PHP Extension;
- Mbstring PHP Extension;
- OpenSSL PHP Extension;
- PDO PHP Extension;
- Tokenizer PHP Extension;
- XML PHP Extension.
В Ubuntu эти зависимости можно установить при помощи команды в терминале:
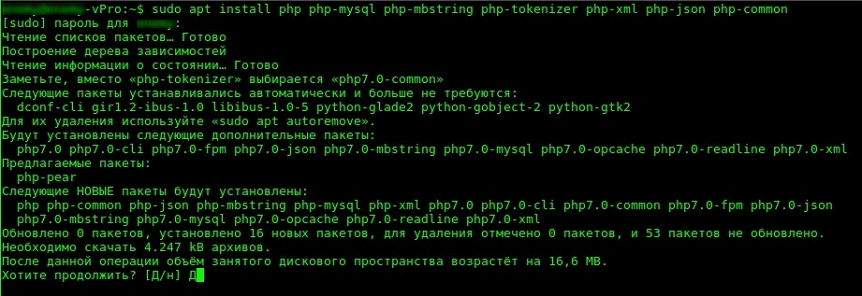
Об успешной установке будут свидетельствовать следующие строки в терминале:

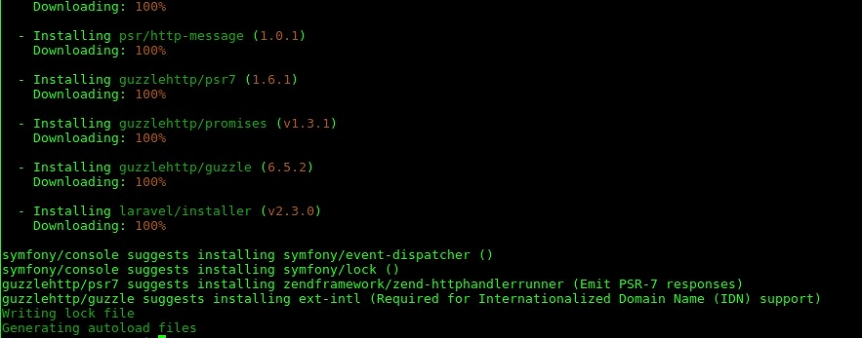
Установка через Composer
Чтобы работать с Laravel потребуется предварительно установить Composer, поскольку фреймворк управляет с его помощью своими зависимостями:
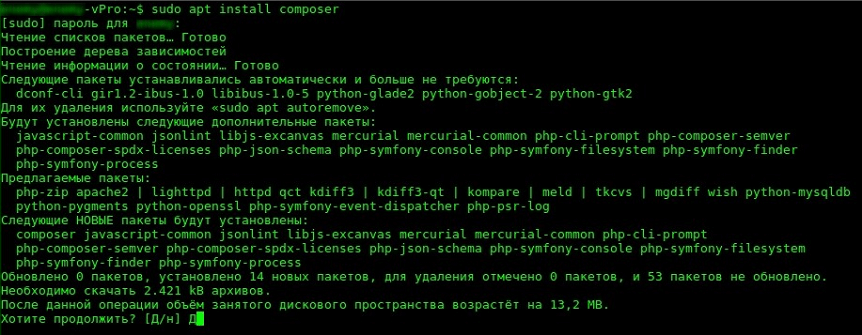
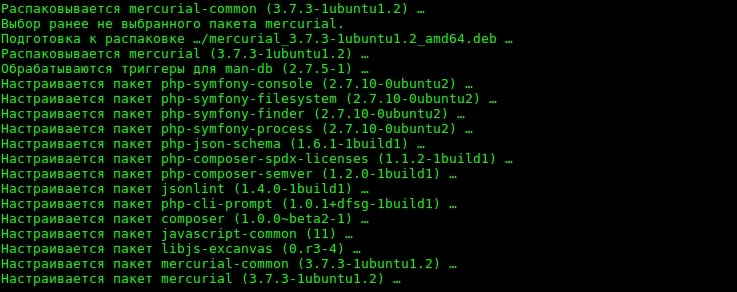
После установки появится сообщение об автоматической настройке следующих пакетов:
Теперь можно переходить непосредственно к установке фреймворка. Сначала необходимо загрузить его установщик через Composer:
В некоторых случаях выполнение этой команды может занять определенное время.
Далее, обязательно нужно поместить общесистемный каталог bin от Composer в свой каталог $PATH . Это позволит Ubuntu распознать исполняемый файл Laravel.
Этот каталог расположен в разных местах, в зависимости от дистрибутива. В Ubuntu он располагается по следующему пути:
Пользователи других дистрибутивов могут поискать здесь:
Использование Laravel Installer
Запустить установщик Laravel в Composer можно следующей командой в терминале:
После ее выполнения отобразится список, где фреймворк будет расположен в первых рядах.
Далее достаточно ввести команду laravel new , после чего свежий фреймворк Laravel будет установлен в заранее указанном каталоге. К примеру, данная команда позволит создать папку под названием blog , где будут находиться Laravel со всеми установленными зависимостями:
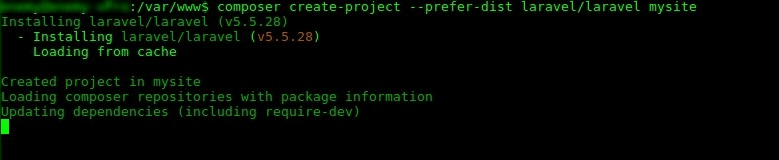
Запуск фреймворка через Composer Create-Project
В Composer поддерживается возможность установки Laravel через команду сomposer create-project :
Эту команду необходимо выполнять, предварительно перейдя в папку, где будет храниться будущий сайт. Например, на локальном сервере Apache по умолчанию это каталог: cd /var/www/ .
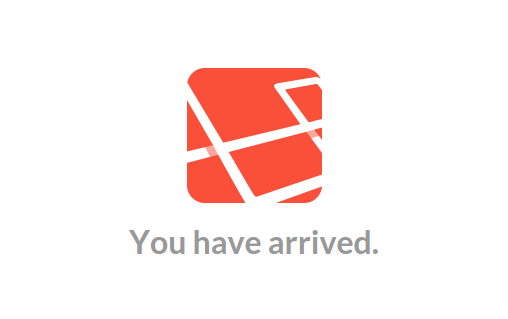
Работа на локальном сервере
После того, как Laravel установлен, следует убедиться в его работоспособности с помощью скрипта командной строки artisan (Artisan CLI). Для этого надо активировать встроенный в PHP локальный сервер с помощью команды:

После ее ввода станет доступен локальный сервер по адресу http://localhost:8000 . Перейдя по нему, можно увидеть заставку-приветствие «You have arrived» («Вы прибыли»).
Чтобы увидеть полный список команд для artisan, введите:
Последующая настройка
Публичная директория
Когда Laravel будет успешно установлен, сразу же потребуется настроить перенаправление файлов приложения в общедоступную папку /public . Файл index.php в этом каталоге используется как фронт-контроллер для всех HTTP-запросов, поступающих в создаваемое приложение.
Файлы настроек
Конфигурационные файлы — это PHP-скрипты, хранящиеся в application/config и вложенных подпапках.
Сами файлы представляет собой набор пар ключ массива => значение , где «ключ» — имя отдельной опции.
Права на доступ
В большинстве случаев, при настройке Laravel будет нужно отредактировать права доступа к директории /var/www , где по умолчанию хранятся веб-приложения. В противном случае фреймворк не сможет нормально функционировать.
Как получить права доступа
1. Добавить себя в группу владельцев веб-сервера www-data :
Если пользователь вошел с root правами, этот пункт опускается.
2. Изменить права владельца на Laravel-проект командой:
3. Даются права на запись в папку-хранилище storage:
Для пользователя root (помимо первого пункта) из алгоритма исключается команда sudo.
Ключ приложения
Еще одна необходимая вещь, которую обязательно стоит сделать, когда Laravel установлен на хостинге – создать ключ приложения. При отсутствии установленного ключа приложения сеансы пользователей и другая конфиденциальная информация не будут защищены.
Он представляет собой случайно сгенерированную строку в 32 символа. Если для установки использовался Composer или установщик Laravel, ключ автоматически создается указанной командой:
После создания ключ следует вписать как параметр в файл окружения .env. Если такой файл первоначально существовал в Laravel с расширением .env.example, то следует обязательно изменить расширение на .env.
Дополнительная настройка
Laravel сразу же после установки почти не нуждается в более подробном конфигурировании. Однако при желании можно ознакомиться с файлом конфигурации config/app.php и его документацией.
В нем указано несколько параметров, включая часовой пояс и локализацию, которые можно изменить с учетом особенностей разрабатываемого приложения.
Настройка веб-сервера
Настройка общедоступной директории
После установки и настройки Laravel нужно обязательно указать встроенную во фреймворк папку public в качестве корневого каталога веб-сервера. К этой общедоступной папке будут идти все входящие обращения из Сети. Обрабатывать входящие HTTP-запросы будет расположенный в public файл фронт-контроллер index.php .
Настройка веб-адресов
Apache
В установленном Laravel по умолчанию присутствует файл public/.htaccess . Он используется для того, чтобы URL-адреса отображались без указания фронт-контроллера index.php . Если Laravel установлен на веб-сервере Apache, для этого следует активировать модуль mod_rewrite . Тогда веб-сервер будет учитывать опции файла .htaccess .
Возможно, включенный в Laravel файл .htaccess не сможет заработать на установленном сервере. Тогда решить проблему может созданный аналогичный файл со следующим кодом:
Nginx
Пользователям Nginx потребуется добавить еще одну директиву в конфигурации сайта. Она направит все запросы на фронт-контроллер index.php :
Начни экономить на хостинге сейчас — 14 дней бесплатно!
Creating Custom Composer Commands with PHP Artisan in Laravel
A rtisan is a command line utility that comes with Laravel, one of the most popular PHP frameworks.This utility is extensively used for setting up migrations, routes listings, queueing, class creations, and other related tasks.
For a complete list of tasks that Artisan could help with, run the following command inside the Laravel project directory:
Make is an important command in Artisan, used for creating custom Artisan commands.
If you have a task which often pops up during your projects, create an Artisan command, add the code into the class, and fire away from the CLI. Optionally, add the Artisan command as a cron job.
What is PHP Artisan?
If you haven’t worked with Laravel, then you might not be familiar with Laravel artisan commands. Developers use PHP Artisan to perform some important functional operations which include generating migrations, publishing package assets and many similar tasks. You can not only work with built-in Laravel commands in Artisan, but can also work with your own custom Laravel commands as well.
Powerful Laravel Hosting For All Your Needs
Grow your Laravel app with our feature-rich managed hosting
There is a whole list of pre-built Laravel artisan commands you can use to your advantage, but many developers like to create their own commands according to their project needs. To check out the pre-built PHP Laravel artisan commands, just type the following command, and you will get the complete list of Laravel artisan commands list on screen.
You will get the complete list of built-in PHP Laravel artisan commands. All of these commands help developers do their work with more efficiency, thereby saving them their precious time. Using these Laravel artisan commands, you can create auth, controller, model, mail, migration and many other functions.
Laravel Artisan commands foundation
Laravel 3.0 was quite basic in its code structure, but it still had some excellent features to offer. With Laravel 5.7 release, you get some existing packages developed by other Laravel developers as well. Therefore, Laravel 4 mainly depends on the packages from Symfony framework.
Looking closely at the source of Artisan application in IlluminateConsoleApplication directory, you will notice that the class itself extends SymfonyComponentConsoleApplication.
Although Artisan uses the Symfony’s most known console component, it still has some common methods named with Laravel-like aliases. Hence, being a developer, you will still feel developing natively with Laravel.
Laravel PHP artisan server
The Laravel PHP artisan serve command helps running applications on the PHP development server. As a developer, you can use Laravel artisan serve to develop and test various functions within the application. It also accepts two additional options. You can use the host for changing application’s address and port. Meanwhile, you can also use the port option to change the port of the application.
You Might Also Like: Install Laravel 5.8 on Server
Laravel 5.7 Custom Artisan Command
Using Laravel, you can easily create custom artisan commands. Just type the following command in the Artisan Console to create a new custom command:
Now open your terminal and execute the following command.
Once you execute the above-mentioned command completely, you will get a file in the app/console/Commands directory with the name ‘CreateEmployeeAccount’. Here is the code:
Now, it’s time to update the newly created Laravel command. We will define $user to create admin and $description to create user account having admin role. Defining these, we also have to update the role field in the users table.
After this, if you run the php artisan in Laravel , it will show you an error saying the command still not exists. It is because the command is still not registered in the list and is not being read up by the terminal. To register the command, you must update the Kernel.php file located inside the app/Console directory.
Once you update the command in Kernel.php, you can now use the newly created command. You can also check it in the list by using php artisan list command.
Database Migration
The above-mentioned command still doesn’t work for anything, as you haven’t edited any logic in it. So, let’s first create migration tables with the following command:
Now, check your migration folder and you will see the newly created migration table. You can also setup the up() and down() functions for your convenience.
Model
Now, you will have to update you model array with the following code:
After this, you can update your handle() according to your desired requirements:
Final Words
This brings us to the end of this article. It demonstrates how to create custom composer command using the Artisan command. Using PHP Artisan, you can develop different commands depending upon the needs of your project. If you still have any questions regarding this article, or have any query related to Artisan command, feel free to share them in the comments’ section below.
Share This Article
Launch Laravel apps with 1-Click Install. Painless Server Management
Deploy your apps on optimized Laravel hosting servers.